The user portal is a paid extension of formcycle, which is available from formcycle version 8.4.0 onwards. If you have any questions about licensing, please contact your organisational contact person.
Note: The new actions that can be used with the new feature are described in the article: Preparing existing forms.
Contents
Create new portal
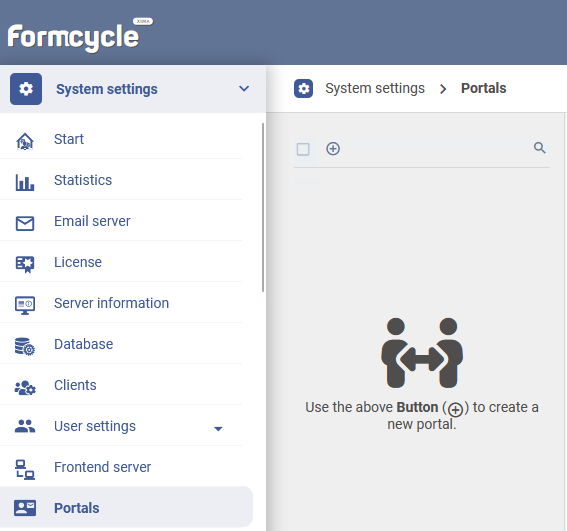
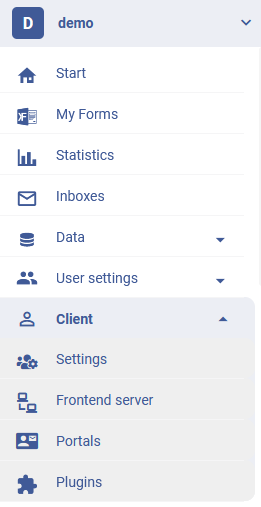
The user portal is set up via the system settings or directly in the client. New portals can be created using the "(+)" icon. Depending on the licence purchased, it is possible to create multiple portals.
Attention: Currently, it is necessary to set all rights in user settings under "Roles > Client > Portals" or "System settings > User settings > Users > System permissions". Only then can a portal be created.If the portal is configured or created via the system settings, forms from different clients can be provided via a portal. If, on the other hand, the portal is configured or created within a single client, only the forms for that specific client are available.
Note: The purchased portal is activated in the client by default in the licence. If system activation is required, this must be communicated when placing the order.
Menu item in the system settings (log in as system administrator):
Menüpunkt im Mandanten:
Multilingualism
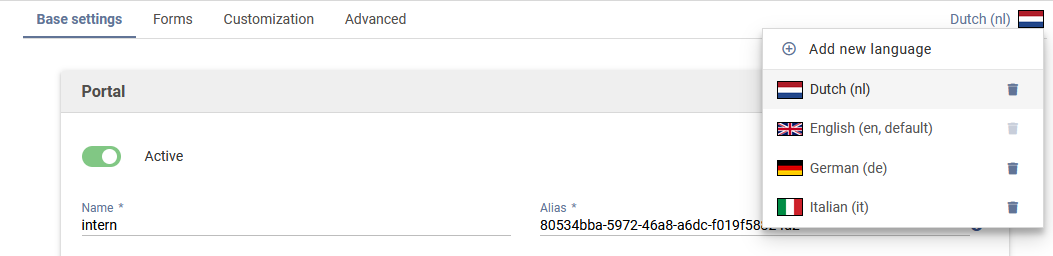
A portal can be provided in multiple languages so that content is displayed to users in the appropriate language.
Add new language
Open the portal settings.
Click on the language icon in the top right corner.
Select "Add new language".
Select the preferred language from the list.
After adding, an additional input field for the portal details in the selected language will be available.
Change language
To edit or view the content in another language, simply select the appropriate language from the language menu.
Base settings
Section Portal
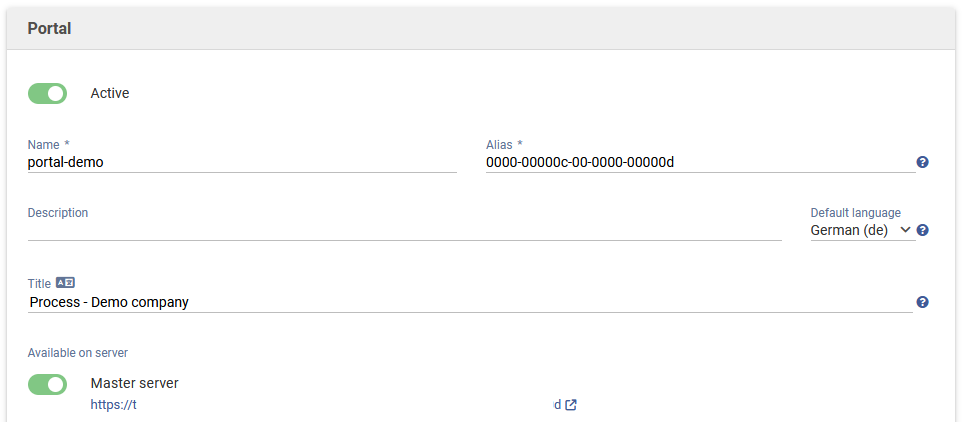
The basic data for a portal is specified in the "Portal" section.
| Name | Unique name of the portal. Allowed characters are letters, numbers and the separators plus (+), minus (-) and underscore (_). Maximum 100 characters. |
| Alias | The alias is part of the portal URL and thus determines the address at which the portal can be accessed. Initially, a UUID is assigned. |
| Description | Free text for a description. |
| Title | The text provided here is used, for example, for the browser tab label. |
| Available on server | Specifies on which servers the portal is available. If you are not using a frontend server, only the master server option is available. After activating the option, you will see the URL that can be used to access the portal. |
Section Login screen
This is where you can activate or deactivate the "login services" configured in the system for the portal. You can also customise the appearance of the login dialogue via the interface.
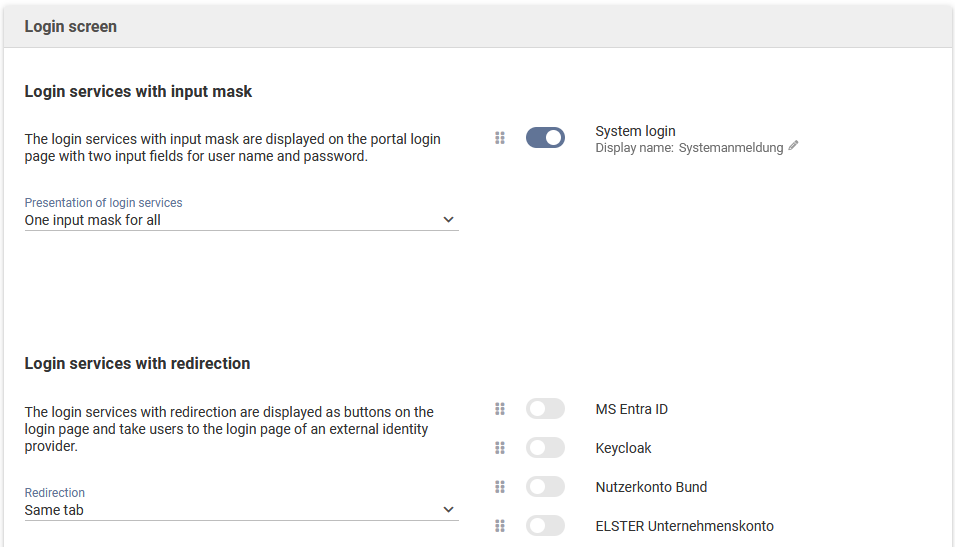
Login services with input mask
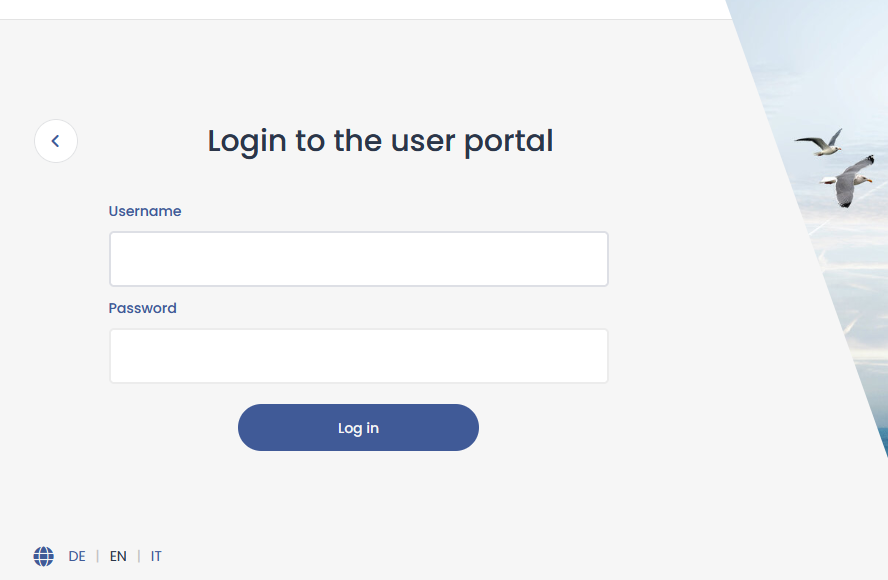
Login services with an input mask are displayed on the portal's login page with two input fields for the user name and password.
Display for multiple login services
If several login services have been activated, the display on the login page can be configured:
One input mask: All login services use a common input mask.
Separate tabs: Each login service is displayed in its own tab, allowing users to select the service they want.
The desired appearance can be specified in the portal settings.
Login dialogue with login services (input mask):
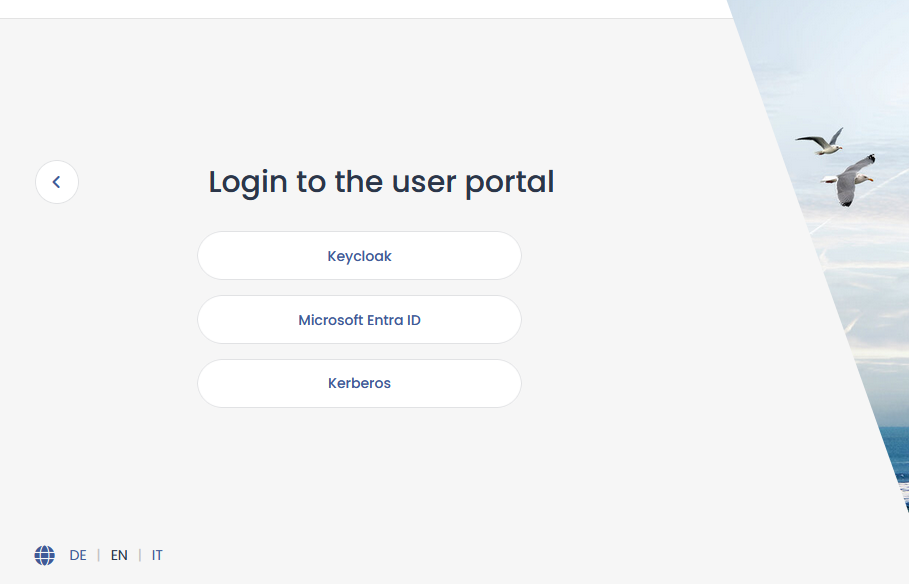
Login services with redirection
Login services that refer to an external login are displayed as separate buttons on the portal's login page (see screenshot below). When selecting one of these buttons, the user is automatically redirected to the login page of the corresponding external identity provider.
These login services can be configured under User settings > Login Services.
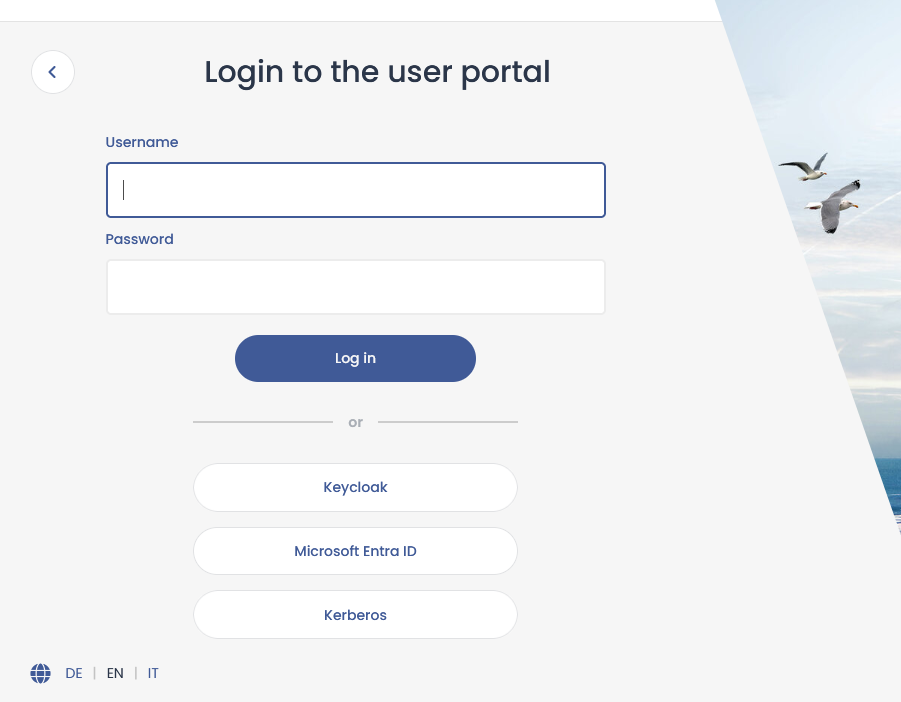
The following image shows the display on the portal’s login page when login services with input and login services with redirection are configured together.
Forms
(up to formcycle version 8.5.6)
On the Forms tab, you can select which forms should be available in the portal.

To display or edit additional information for a form, click the corresponding application in the list. The following input options are available:
Description of the form
Keywords for improved searchability
Preview image to be displayed in the portal
All additional information can be maintained in multiple languages, provided that the respective language has been configured in the portal.
Note: Only forms with the state “online” are displayed in the list.
Portal content
8.6.0
On the Portal content tab, you specify which content is available in the portal. In earlier versions, this tab was called Forms.
|
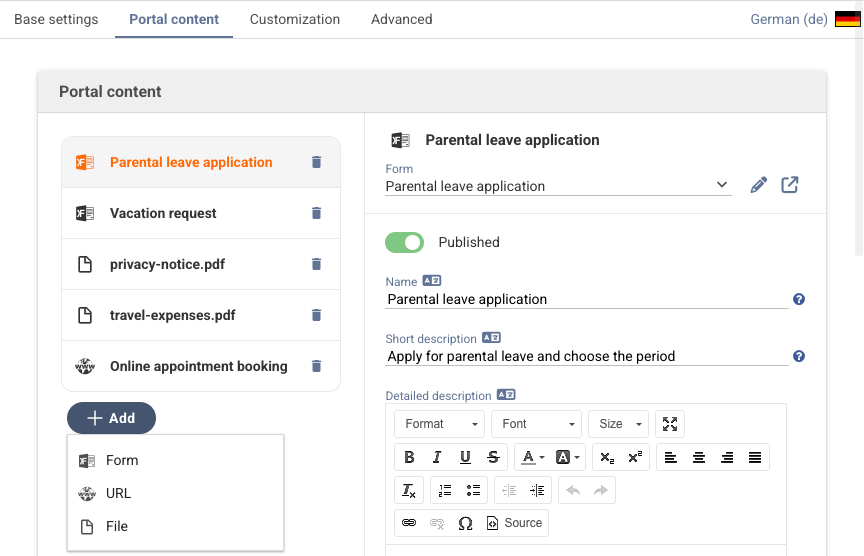
Edit portal content
To view or edit additional information for a portal content, click the corresponding entry in the list. You can specify the following:
- Description of the content
- Keywords to make the content easier to find
- Preview image to be displayed in the portal
All additional information can be maintained in multiple languages, provided the respective language is configured in the portal.
Use existing description as fallback
If you do not enter a separate short description or description for a portal content, the portal can use the existing description instead, e.g. the description of the form.
The portal search also takes this fallback description into account. End users can therefore also find content using terms from the original description.
Content types
In addition to forms, you can also provide files and links in the portal. The following content types are available:
- Form: a form that end users can fill out and submit in the portal.
- URL: a link to a page outside the portal. In the portal, this content type is labeled Website.
- File: a file that end users can download, e.g. an information sheet or a privacy notice.
Display example of a form’s portal settings:

Legend:
| 1. Name | The name entered here is displayed in the portal for the form / process. |
| 2. Short description | Short description of the form / process in the portal overview. |
| 3. Detailed description | After clicking the context-sensitive help icon (“i”), the detailed description is displayed. |
| 4. Preview image | Displays the image in the portal overview and in the detail view. |
| 5. Detail view | Opens the detail view. |
| 6. Keywords | Keywords can be assigned to each form and used to filter the form overview in the portal. |
Customization
Under Customization, the portal’s text content and design can be adapted to your needs.
Images
In the Images section, you can define and upload a logo as well as an image for the login page and the portal page, if needed.

| 1. Home / Login | This image appears on the homepage as well as on the login page. |
| 2. Logo | The portal logo stored here is displayed on all portal pages and serves as a consistent visual identifier. |
Theme (CSS)
In this section, custom CSS code can be added to individually customize the appearance of the portal.
Which elements or selectors can be targeted and styled via CSS can currently only be determined using the developer tools of common web browsers. Open them to analyze the structure and class names of the page elements.
Note: Changes should only be made if sufficient CSS knowledge is available. Incomplete or incorrect code may negatively affect the appearance of the portal.
The CSS code can optionally be maintained in multiple languages to implement language-dependent designs.
Theme (JS)
In this section, custom JavaScript code can be added to implement additional functions or behavior adjustments in the portal.
Which elements or selectors can be accessed and modified via JavaScript can currently only be determined using the developer tools of the respective web browser. These make it possible to analyze the underlying HTML structure and class names.
Note: Changes should only be made if sufficient JavaScript knowledge is available. Incorrect code may lead to functional issues or display problems in the portal.
The JavaScript code can optionally be maintained in multiple languages to implement language-dependent functionality.
Content of Pages and Sections
In this section, the text content of the following pages and areas can be customized:
- Page: Home
- Page: Form Overview
- Page: Login
- General Translations
- Portal Header
- Page: Process Overview
- Message View
- Portal Messages
- Links
All entries can be maintained in multiple languages, allowing language-dependent display of portal content.

In the Links section, various links can be stored—analogous to link management in a formcycle form—for example to the imprint or privacy policy. The configured links are displayed in the portal footer.


Advanced
Settings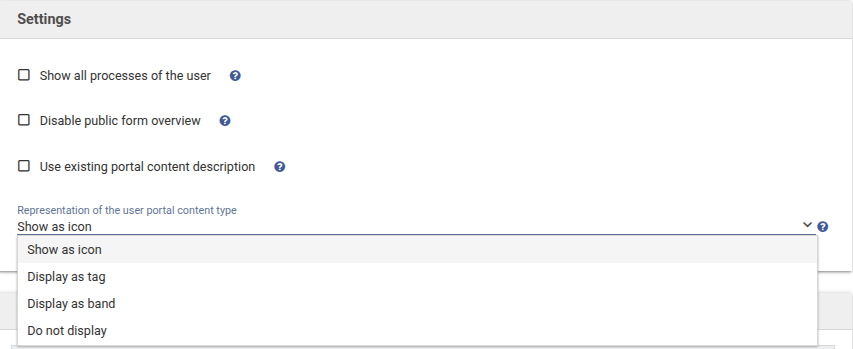
Show all user processes | If this option is enabled, all user processes are displayed regardless of the forms configured in the portal. If the option is disabled, only processes related to forms of this portal are displayed. |
| Disable public form overview | If this function is enabled, the public form overview cannot be accessed unless the user is logged in to the portal. In addition, the button for the form overview is no longer displayed on the welcome page. |
| Use existing portal content description | If no short description or description is configured for a portal content, the description configured on the linked form, template, or resource is used as a fallback. If this function is disabled, the short description remains empty in that case. |
Representation of the user portal content type
Determines whether the content type of an entry is visible in the portal and how it is displayed, e.g. as an icon on the button used to open the content, as a tag beneath the title, or as a ribbon on the tile.
Properties & Files
Below, localizable properties and files can be managed using key values. You can add your own content here using the buttons “Add property” and “Add file”.
Important note: This information is accessible via the public REST API. It is therefore strongly recommended not to store any confidential data here.

Was this article helpful?
That’s Great!
Thank you for your feedback
Sorry! We couldn't be helpful
Thank you for your feedback
Feedback sent
We appreciate your effort and will try to fix the article
